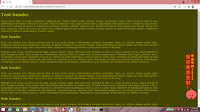
Friday, 11 February 2022

Web Tutorial: The Valentine Letter

Happy upcoming Valentine's Day, ya crazy lovebirds!

It's my pleasure, as always, to present the annual Valentine's Day web tutorial. This one is in standard HTML, CSS and JavaScript, and it will be a simple animation complete with graphics and a sappy love poem. We also want this animation to appear differently according to the time of day.

Ready? Here we go...

The images

For this, we will be using two pairs of backgrounds and one background for the love poem.

These are the sky backgrounds. They have been given a color adjustment in Photoshop, but are otherwise identical.

topbg_day.jpg

topbg_night.jpg


These are the earth backgrounds. They are PNG files with transparency.
middlebg_day.png

middlebg_night.png


This is the background image for the letter.

letterbg.jpg


The starting HTML is as follows.
<!DOCTYPE html>
<html>
    <head>
        <title>Valentine Letter</title>

        <style>

        </style>

        <script>

        </script>
    </head>

    <body>

    </body>
</html>


We set divs to have a translucent red background because there is going to be a fair amount of nesting.
<style>
    div {background: rgba(255, 0, 0, 0.2); }
</style>


Here, we define the function getTimeBg(). Leave it blank, for now.
<script>
    function getTimeBg()
    {

    }

</script>


The body needs to call this function upon loading.
<body onload="getTimeBg()">


Now for the divs! The first div has a CSS class of container.
<body onload="getTimeBg()">
    <div class="container">

    </div>

</body>


This is the styling for container. We want a specific width and height, and it will be set in the middle of the screen via the margin property. We will also give it a nice pink outline.
<style>
    div {background: rgba(255, 0, 0, 0.2); }

    .container
    {
        width: 800px;
        height: 700px;
        margin: 0 auto 0 auto;
        outline: 1px solid rgba(255, 100, 100, 1);
        overflow: hidden;
    }

</style>


Looking a little basic, right?


Now, add in two divs, wth CSS classes top and middle.
<div class="container">
    <div class="top">

    </div>

    <div class="middle">

    </div>

</div>


Here's the styling. They have 100% widths, but different heights. Also, middle has background properties that will fill the entire div. For now, we will leave the background image itself unspecified.
<style>
    div {background: rgba(255, 0, 0, 0.2); }

    .container
    {
        width: 800px;
        height: 700px;
        margin: 0 auto 0 auto;
        outline: 1px solid rgba(255, 100, 100, 1);
    }

    .top
    {
        width: 100%;
        height: 200px;
    }

    .middle
    {
        width: 100%;
        height: 850px;
        margin-top: -200px;
        background-size: cover;
        background-position: middle top;
        background-repeat: no-repeat;
    }

</style>


You can see where they line up.


Within the div styled using CSS class top, we have a div styled using CSS class sky.
<div class="top">
    <div class="sky" id="sky"></div>
</div>


This is the styling for sky. It takes up 400% of its parents width. The background-repeat property is set to repeat-x, because we want the sky background to stretch on forever horizontally.
.top
{
    width: 100%;
    height: 200px;
}

.sky
{
    width: 400%;
    height: 100%;
    background-position: left top;
    background-repeat: repeat-x;
}


See how this works? Don't worry about the content overflowing for the time being; I want you to have a clear visual of what is going on.


Now within the div styled by middle, we have another div styled using letter.
<div class="middle" id="earth">
    <div class="letter">

    </div>

</div>


Here are the CSS styles. letter has a specific width and height, and is set to the middle of its parent using the margin property. Its background is letterbg.jpg, and we set other properties to ensure it fills up the entire thing.
.sky
{
    width: 400%;
    height: 100%;
    background-position: left top;
    background-repeat: repeat-x;
    margin-left: 0px;    
}    

.middle
{
    width: 100%;
    height: 850px;
    margin-top: -200px;
    background-size: cover;
    background-position: middle top;
    background-repeat: no-repeat;
}

.letter
{
    width: 400px;
    height: 500px;
    margin: 0 auto 0 auto;
    background: url("letterbg.jpg");
    background-size: cover;
    background-position: middle top;
    background-repeat: no-repeat;
}


So far so good. We may need to make more adjustments later.


Yet aother div!
<div class="middle">
    <div class="letter">
        <div class="text">

        </div>    

    </div>
</div>


text
is for containing the poem, so we will make it even less wide than letter, set it in the middle using the margin property, and set font sizes.
.letter
{
    width: 400px;
    height: 500px;
    margin: 0 auto 0 auto;
    background: url("letterbg.jpg");
    background-size: cover;
    background-position: middle top;
    background-repeat: no-repeat;
}

.text
{
    width: 80%;
    margin: 0 auto 0 auto;
    font-family: georgia;
    font-size: 12px;
    font-weight: bold;
    line-height: 2.5em;
}


Now we will add two paragraph tags within the div styled using text. They will be styled using poem and author, respectively.
<div class="middle">
    <div class="letter">
        <div class="text">
            <p class="poem">

            </p>
            <p class="author">

            </p>
        </div>    
    </div>
</div>


Fill up the first p tag with the poem, and the second p tag with the author's name.
<div class="middle">
    <div class="letter">
        <div class="text">
            <p class="poem">
                <br />
                How do I love thee? Let me count the ways.<br />
                I love thee to the depth and breadth and height<br />
                My soul can reach, when feeling out of sight<br />
                For the ends of being and ideal grace.<br />
                I love thee to the level of every day's<br />
                Most quiet need, by sun and candle-light.<br />
                I love thee freely, as men strive for right.<br />
                I love thee purely, as they turn from praise.<br />
                I love thee with the passion put to use<br />
                In my old griefs, and with my childhood's faith.<br />
                I love thee with a love I seemed to lose<br />
                With my lost saints. I love thee with the breath,<br />
                Smiles, tears, of all my life; and, if God choose,<br />
                I shall but love thee better after death.<br />
            </p>
            <p class="author">
                - Elizabeth Barret Browning
            </p>

        </div>    
    </div>
</div>


Let's style those p tags. This is just for aesthetics.
.text
{
    width: 80%;
    margin: 0 auto 0 auto;
    font-family: georgia;
    font-size: 12px;
    font-weight: bold;
    line-height: 2.5em;
}

.poem
{
    font-style: italic;
}

.author
{
    text-align: right;
}


Here we go!


The backgrounds

First, we add ids to the divs that we need to set backgrounds for.
<div class="top">
    <div class="sky" id="sky"></div>
</div>

<div class="middle" id="earth">


Next, we add in some script. We first get sky and earth using the getElementById() method. Then we get the date using new Date() and assign it to the variable d.
function getTimeBg()
{
    var sky = document.getElementById("sky");
    var earth = document.getElementById("earth");

    var d = new Date();

}


Set an If block, that examines the output of the getHours() method. If the time of the day is between 6 AM and 6 PM (i.e, d.getHours() is between 6 to 18 inclusive), we use the day versions of the backgrounds. If not, we use the night versions.
function getTimeBg()
{
    var sky = document.getElementById("sky");
    var earth = document.getElementById("earth");

    var d = new Date();
    if (d.getHours() >= 6 && d.getHours() <= 18) {
        sky.style.background = "url(topbg_day.jpg)";
        earth.style.background = "url(middlebg_day.png)";
    }
    else
    {
        sky.style.background = "url(topbg_night.jpg)";
        earth.style.background = "url(middlebg_night.png)";
    }

}


It's now 11 PM where I am, so the night versions are on!


At this point, we should be turning off the background color of the divs.
div {background: rgba(255, 0, 0, 0); }


Also, add breaks here to adjust the content. It's a really lazy way, I know.
<div class="middle" id="earth">
    <br /><br /><br /><br /><br /><br /><br /><br /><br />
    <div class="letter">


Animating the sky
For this, we will use CSS3 animations. This will go right into the CSS class sky. We use an animation name, skymove, which we will expand on later, and set a duration. Make this fast, maybe 1 second, so we can check on the smoothness of the animation. The iteration count is set to infinite so that it will go on forever, and we'll set the timing function to linear so that there won't be any acceleration or deceleration of the animation. It will be at a constant speed.
.sky
{
    width: 400%;
    height: 100%;
    background-position: left top;
    background-repeat: repeat-x;
    margin-left: 0px;
    animation-name: skymove;
    animation-duration: 1s;    
    animation-iteration-count: infinite;
    animation-timing-function: linear;    

}


Now we will define skymove. At 100%, the margin-left property is set to minus twice the width of the background, which is minus 1600 pixels.
.sky
{
    width: 400%;
    height: 100%;
    background-position: left top;
    background-repeat: repeat-x;
    margin-left: 0px;
    animation-name: skymove;
    animation-duration: 1s;    
    animation-iteration-count: infinite;
    animation-timing-function: linear;    
}

@keyframes skymove
{
    0%   {margin-left: 0px;}
    100% {margin-left: -1600px;}
}        


Now the sky div moves left! You can see that the animation appears infinite due to the background-repeat property being set to repeat-x.


Set the overflow property of these classes to hidden.
.container
{
    width: 800px;
    height: 700px;
    margin: 0 auto 0 auto;
    outline: 1px solid rgba(255, 100, 100, 1);
    overflow: hidden;
}

.top
{
    width: 100%;
    height: 200px;
    overflow: hidden;
}


Ah, great stuff! Now that the overflow property is set to hidden, it looks like the sky is animated! You may want to make the animation slower, maybe set the duration to 200 seconds or something.


Final loving words

I know I know, this Valentine's day web tutorial is kind of corny. But hey, they can't all be winners. And let's face it, Valentine's Day can be pretty corny.

Did the earth sky move for you? Heh heh.
T___T

Sunday, 6 February 2022

Spot The Bug: Runaway Stock Code

Good day to you, bug-hunters. And welcome to another edition of Spot The Bug!

Let's get busy,
bug-hunters.

Today's problem revolves around PHP. My task was to read from a vendor database that stored data about inventory operations. The frustrating thing was that they didn't have transaction data such as stock code and quantities, but rather a table of comments generated whenever a transaction took place.

Stock (XLL2323) removed. Qty: -2
Stock (XLL2323) removed. Qty: -22
Stock (FRU551100) removed. Qty: -10
Stock (FRU551100) added. Qty: 25
Stock (SMQ010080) added. Qty: 9


So basically I had to retrieve a list of comments generated during a certain date range for a certain stock code, and deduce quantities and direction (in or out) of each transaction. To that end, I basically wrote some test code using a nested Foreach loop. If the Stock Code was inside the comment, then I would obtain the quantity from the comment with a strategic use of some string functions.
$skus = ["XMB2311"];

foreach ($skus as $sku)
{
    echo $sku;
    echo "<br />";
    $inv = 0;

    foreach ($logs as $log)
    {
        if (strpos($log, $sku))
        {
            $split = explode("Qty: ", $log);
            $qty = $split[1];
            $inv += $qty;
            echo $inv;
            echo "<hr />";
        }    
    }
}


What went wrong

This was the result. For the Stock Code XMB2311, which I was investigating, the quantity of the product was increasing over time.. This was despite the fact that a cursory examination of the database showed that there were very few transactions for XMB2311, and none of them involved amounts that would push the inventory up to 88, assuming we started off with a base amount of 0.


Why it went wrong

I added to the test code by displaying the log statements.
foreach ($skus as $sku)
{
    echo $sku;
    echo "<br />";
    $inv = 0;

    foreach ($logs as $log)
    {
        echo $sku . ":" . $log;
        echo "<br />";


        if (strpos($log, $sku))
        {
            $split = explode("Qty: ", $log);
            $qty = $split[1];
            $inv += $qty;
            echo $inv;
            echo "<hr />";
        }    
    }
}


And here, I discovered that not only were the log statements for XMB2311 matching, so were the ones for XMB231109!


The problem was that the some of the Stock Codes were subsets of each other. For instance, "XMB2311" was a subset of "XMB231109". So if I was doing a search for "XMB2311" in a comment that featured Stock Code XMB231109, the result would be true, and the code in the If block would be fired off erroneously!

How I fixed it

Adding a ")" in the argument to be searched. This way, the strpos() function would search specifically for the Stock Code and only that Stock Code (because all the Stock Codes in the comments ended in a ")"!
if (strpos($log, $sku . ")"))


There it was!


Moral of the story

Sometimes it's not so much that your code is completely wrong, but that it is not exact enough for that particular use case. In this instance, a closer look had to be taken at the data in order to see exactly what went wrong.

Warm_regards . ")",
T___T

Thursday, 3 February 2022

How I Learned Data Visualization

Recent years have seen me dwelve into Data Analytics. But even before that, I was exploring Data Visualization.

It all began when I ran some experiments with HTML, CSS and JavaScript to produce bar charts. That was straightforward enough, though line charts and pie charts took a lot more creativity.

HTML//CSS/JavaScript projects.


During one of my job interviews, I came across something in the list of required skills - D3 or Highcharts. I did not pass that interview, but after seeing that requirement in other job descriptions, I got curious enough to look it up. What I found blew my mind.

Exploring D3

D3 was the first thing I explored on the official website. Half of the library functions did not make sense to me and I have never been great at reading documentation. Thus, there was one thing left to do. I copied the example code and pasted it into a script, then ran it. Then I started changing the code, finding out what would happen when I commented out certain lines, or changed certain numbers. With my findings, I now knew what to look up on the documentation.

D3 projects


Within a week of practice, I was able to replicate the results of my earlier experiments, but now using D3. And then I wrote web tutorials pertaining to creating that code, because teaching code is a great way to cement that knowledge in your brain.

My experimentation was stalled somewhat due to the fact that exploring D3 naturally brought me to explore SVG as well. This was fun as well, but only peripherally related to Data Visualization.

Exploring Highcharts

This portion of my exploration was delayed due to several reasons - struggles with the chaos caused in the wake of the COVID-19 pandemic, experimentation in other areas and generally, bigger fish to fry. Yet, get to it I did eventually. Again, it began with the documentation in the official website, example code and a lot of trial and error before I produced my first web tutorial.

Highcharts project

At the time of this writing, I have yet to produce as extensively as I have done with D3. The only thing I have produced is a column chart in the same vein of what I had produced earlier with D3 and old-fashioned HTML, CSS and JavaScript... yet it was so easy that I suspect that even if I were to produce as many projects, it would not take me a lot of time.

I will sing the praises of Highcharts some other time.

Exploring other Data Visualization tools

Harkening back to almost the whole of 2021, I undertook a course in Data Analytics, an experience of which I will speak of another day. Suffice to say, part of the course covered Data Visualization. To whit, I was introduced to Data Visualization software which I had never encountered prior to this, such as Tableau, Spotfire and Power BI.

Data Visualization tools

It opened my eyes. Now I was no longer writing code to display the data; it was already being handled by these tools. Instead, I was doing the work prior to the Data Visualization. The cleaning. The reorganization. Making things make sense.

In other words, I was working on another level of the Data Visualization. I won't pretend that it wasn't sometimes mind-numbingly boring work, but it did give me a greater appreciation of the process.

All in all...

My little dive into Data Visualization was mostly brought on by professional curiosity. A curiosity that was in turn triggered by my almost obsessive need to know what things my industry wants of its professionals. But all the knowledge I have gained would not have been possible had I not followed up with the work required. This sounds like a lot of patting myself on the back, but what I really want to say is - stay curious, stay committed. It'll go a long way.

Serious as a chart attack,
T___T

Friday, 28 January 2022

Web Tutorial: The Lucky Number Generator, redux (Part 2/2)

Time to draw a tiger!

We begin this process by changing the code here to reflect the year. This is 2022, which means a tiger will be drawn.

tt_cny2022.html
<body onload="cny(2022)">


In the JavaScript file, we create an If block for the tiger in the createAnimal() function.

cny.js
if (animalName == "tiger")
{

}


Start off with the face. It's a variable named - you guesse it - face. It's a div that is 80 by 70 pixels, round corners and an orange background. We make sure it floats right because we want it flush to the right of the screen. This div has no border except for the bottom, which is a 5 pixel thick white line. Since we have rounded corners, the effect is going to be nice, like a beard. Lastly, we make sure the cursor property is set to pointer.

cny.js
if (animalName == "tiger")
{
    var face = document.createElement("div");
    face.style.width = "80px";
    face.style.height = "70px";
    face.style.borderRadius = "50%";
    face.style.position = "relative";
    face.style.backgroundColor = "rgba(255, 100, 0, 1)";
    face.style.borderBottom = "5px solid rgba(255, 255, 255, 1)";
    face.style.float = "right";
    face.style.cursor = "pointer";

}


Return face, and that's it for now.

cny.js
if (animalName == "tiger")
{
    var face = document.createElement("div");
    face.style.width = "80px";
    face.style.height = "70px";
    face.style.borderRadius = "50%";
    face.style.position = "relative";
    face.style.backgroundColor = "rgba(255, 100, 0, 1)";
    face.style.borderBottom = "5px solid rgba(255, 255, 255, 1)";
    face.style.float = "right";
    face.style.cursor = "pointer";

    return face;
}


You see what we're doing here?


This tiger needs some ears. We are going to have a container div for these, in a variable called ears. We make it fit 100% of its parent, which will be face. The height will be 35 pixels. At the end, before returning face, we append ears to face.

cny.js
    face.style.cursor = "pointer";

    var ears = document.createElement("div");
    ears.style.width = "100%";
    ears.style.height = "35px";
    ears.style.position = "relative";

    face.appendChild(ears);


    return face;
}


Now we declare leftEar and rightEar. They're both oval orange divs, except that one is floated left, and one right. Both are appended into ears.

cny.js
    face.style.cursor = "pointer";

    var ears = document.createElement("div");
    ears.style.width = "100%";
    ears.style.height = "35px";
    ears.style.position = "relative";

    var leftEar = document.createElement("div");
    leftEar.style.width = "15px";
    leftEar.style.height = "35px";
    leftEar.style.float = "left";
    leftEar.style.backgroundColor = "rgba(255, 100, 0, 1)";
    leftEar.style.borderRadius = "50%";

    var rightEar = document.createElement("div");
    rightEar.style.width = "15px";
    rightEar.style.height = "35px";
    rightEar.style.float = "right";
    rightEar.style.backgroundColor = "rgba(255, 100, 0, 1)";
    rightEar.style.borderRadius = "50%";

    ears.appendChild(leftEar);    
    ears.appendChild(rightEar);


    face.appendChild(ears);
    
    return face;
}


Those are some adorable ears!


This tiger needs stripes. For this, we are going to do pretty much what we did for the ears - create a container div and fill it with content, except we'll have two divs. These divs are stripes and stripes2.

cny.js
    ears.appendChild(leftEar);    
    ears.appendChild(rightEar);

    var stripes = document.createElement("div");

    var stripes2 = document.createElement("div");


    face.appendChild(ears);
    
    return face;
}    


The height and width of stripes will fill the entirety of its parent, which will be face. It is round, floated left, and the color property has been set to black. More importantly, we set the overflow property to hidden because the text that we're putting into, three pipe symbols, may get out of the div. For this, the position property will also be set to relative. Text and font properties and the top margin are really up to you, but I would stick with what I've done here because it's all been verified through trial and error.

cny.js
    ears.appendChild(leftEar);    
    ears.appendChild(rightEar);

    var stripes = document.createElement("div");
    stripes.style.width = "100%";
    stripes.style.height = "100%";
    stripes.style.borderRadius = "50%";
    stripes.style.position = "relative";
    stripes.style.color = "rgba(0, 0, 0, 1)";
    stripes.style.float = "left";
    stripes.style.overflow = "hidden";
    stripes.style.marginTop = "-35px";
    stripes.style.fontSize = "2em";
    stripes.style.fontWeight = "bold";
    stripes.style.lineHeight = "0.5em";
    stripes.style.textAlign = "center";
    stripes.innerHTML = "|||";


    var stripes2 = document.createElement("div");

    face.appendChild(ears);
    
    return face;
}    


Append stripes to face.

cny.js
    var stripes = document.createElement("div");
    stripes.style.width = "100%";
    stripes.style.height = "100%";
    stripes.style.borderRadius = "50%";
    stripes.style.position = "relative";
    stripes.style.color = "rgba(0, 0, 0, 1)";
    stripes.style.float = "left";
    stripes.style.overflow = "hidden";
    stripes.style.marginTop = "-35px";
    stripes.style.fontSize = "2em";
    stripes.style.fontWeight = "bold";
    stripes.style.lineHeight = "0.5em";
    stripes.style.textAlign = "center";
    stripes.innerHTML = "|||";

    var stripes2 = document.createElement("div");

    face.appendChild(ears);
    face.appendChild(stripes);
    
    return face;
}


Nice, right?! There's more...


This is pretty much more of the same for stripes2, but we use a series of equal signs as text content.

cny.js
    stripes.style.textAlign = "center";
    stripes.innerHTML = "|||";

    var stripes2 = document.createElement("div");
    stripes2.style.width = "100%";
    stripes2.style.height = "100%";
    stripes2.style.borderRadius = "50%";
    stripes2.style.position = "relative";
    stripes2.style.color = "rgba(0, 0, 0, 1)";
    stripes2.style.float = "left";
    stripes2.style.overflow = "hidden";
    stripes2.style.marginTop = "-70px";
    stripes2.style.fontSize = "2em";
    stripes2.style.fontWeight = "bold";
    stripes2.style.lineHeight = "0.5em";
    stripes2.style.textAlign = "center";
    stripes2.innerHTML = "<br /><br />===<br />===";


    face.appendChild(ears);
    face.appendChild(stripes);
    face.appendChild(stripes2);
    
    return face;
}


Horizontal stripes!


Now for the eyes! This will be a container div, called eyes. In this, we will have divs, leftEye and rightEye. They're basically elliptical divs with a little bit of rotation thrown in.

cny.js
    stripes2.style.textAlign = "center";
    stripes2.innerHTML = "<br /><br />===<br />===";

    var eyes = document.createElement("div");
    eyes.style.width = "80px";
    eyes.style.height = "20px";
    eyes.style.float = "left";
    eyes.style.margin = "-45px auto 0 auto";
    eyes.style.fontSize = "15px";
    eyes.style.fontWeight = "bold";
    eyes.style.color = "rgba(0, 0, 0, 1)";

    var leftEye = document.createElement("div");
    leftEye.style.width = "20px";
    leftEye.style.height = "5px";
    leftEye.style.float = "left";
    leftEye.style.border = "3px solid rgba(0, 0, 0, 1)";
    leftEye.style.borderRadius = "50%";
    leftEye.style.backgroundColor = "rgba(255, 100, 0, 1)";
    leftEye.style.transform = "rotate(20deg)";
    leftEye.style.marginLeft = "10px";

    var rightEye = document.createElement("div");
    rightEye.style.width = "20px";
    rightEye.style.height = "5px";
    rightEye.style.float = "right";
    rightEye.style.border = "3px solid rgba(0, 0, 0, 1)";
    rightEye.style.borderRadius = "50%";
    rightEye.style.backgroundColor = "rgba(255, 100, 0, 1)";
    rightEye.style.transform = "rotate(-20deg)";
    rightEye.style.marginRight = "10px";

    eyes.appendChild(leftEye);    
    eyes.appendChild(rightEye);    


    face.appendChild(ears);
    face.appendChild(stripes);
    face.appendChild(stripes2);
    face.appendChild(eyes);

    return face;
}    


Those are some big eyes.


Next up is the snout. It's a circular orange area that will block off some of the stripes. Within it, there will be a black letter "Y" to represent the nose.

cny.js
    eyes.appendChild(leftEye);    
    eyes.appendChild(rightEye);    

    var snout = document.createElement("div");
    snout.style.width = "50px";
    snout.style.height = "40px";
    snout.style.borderRadius = "50%";
    snout.style.position = "relative";
    snout.style.float = "left";
    snout.style.margin = "-35px 0 0 15px";
    snout.style.fontSize = "15px";
    snout.style.textAlign = "center";
    snout.style.fontWeight = "bold";
    snout.style.backgroundColor = "rgba(255, 100, 0, 1)";
    snout.style.borderBottom = "5px solid rgba(255, 255, 255, 1)";
    snout.style.color = "rgba(0, 0, 0, 1)";    
    snout.innerHTML = "Y";


    face.appendChild(ears);
    face.appendChild(stripes);
    face.appendChild(stripes2);
    face.appendChild(eyes);
    face.appendChild(snout);

    return face;
}        


Definitely taking shape now.


Finally, we give the tiger a mouth. It will be superimposed on top of snout by way of the margin property. Here, I have made it a white div with black text. The "teeth" are actually a series of "V"s. Note that the letter spacing and line height are specified so as to pack them close together and make them look like a row of teeth. Also, the transition property is specified and we give it a class name of cny_mouth because we will be animating this.

cny.js
    snout.style.color = "rgba(0, 0, 0, 1)";    
    snout.innerHTML = "Y";

    var mouth = document.createElement("div");
    mouth.className = "cny_mouth";
    mouth.style.width = "40px";
    mouth.style.height = "10px";
    mouth.style.borderRadius = "5px";
    mouth.style.position = "relative";
    mouth.style.float = "left";
    mouth.style.overflow = "hidden";
    mouth.style.margin = "-20px 0 0 20px";
    mouth.style.fontSize = "15px";
    mouth.style.textAlign = "center";
    mouth.style.backgroundColor = "rgba(255, 255, 255, 1)";
    mouth.style.color = "rgba(0, 0, 0, 1)";    
    mouth.style.lineHeight = "0.7em";
    mouth.style.letterSpacing = "-0.05em";
    mouth.style.transition = "all 0.1s";
    mouth.innerHTML = "VVVVV";


    face.appendChild(ears);
    face.appendChild(stripes);
    face.appendChild(stripes2);
    face.appendChild(eyes);
    face.appendChild(snout);
    face.appendChild(mouth);

    return face;
}


This is what those teeth look like!


Now we will animate this. Go to the cny() function and add an If block after the one for the pig.

cny.js
if (animalNames[yearIndex] == "pig")
{
    setInterval
    (
        function()
        {
            var eyes = document.getElementsByClassName("cny_eyes");

            eyes[0].innerHTML = "-&nbsp;&nbsp;-";

            setTimeout
            (
                function()
                {
                    eyes[0].innerHTML = "&bull;&nbsp;&nbsp;&bull;";
                },
                500
            );
        },
        5000
    );

    setInterval
    (
        function()
        {
            var tail = document.getElementsByClassName("cny_tail");

            tail[0].style.transform = "rotate(-185deg)";

            setTimeout
            (
                function()
                {
                    tail[0].style.transform = "rotate(-175deg)";
                },
                500
            );
        },
        1000
    );        
}

if (animalNames[yearIndex] == "tiger")
{
        
}


In here, we use the setInterval() function with a 1 second interval. And inside the callback, we use a setTimeout() function with a half-second duration.

cny.js
if (animalNames[yearIndex] == "tiger")
{
    setInterval
    (
        function()
        {
            setTimeout
            (
                function()
                {

                },
                500
            );
        },
        1000
    );     
   
}


Then we declare mouth inside the first callback, setting it to the array returned by getting all elements with the class cny_mouth. The first (and only) element of mouth will have height set to 5 pixels. The callback within the setTimeout() function will set it back to 10 pixels. Note that since we had the div's overflow property set to hidden, there should be no issue with the teeth jutting out of the resized mouth.

cny.js
if (animalNames[yearIndex] == "tiger")
{
    setInterval
    (
        function()
        {
            var mouth = document.getElementsByClassName("cny_mouth");
            mouth[0].style.height = "5px";


            setTimeout
            (
                function()
                {
                    mouth[0].style.height = "10px";
                },
                500
            );
        },
        1000
    );        
}


If you refresh, the tiger should be snarling!


And clicking on the tiger still works!


The Year of the Tiger approaches!

Be bold and ferocious like the tiger, and may you achieve your goals in 2022!

It's been a pleasure presenting this web tutorial. Do enjoy your Lunar New Year.


Here's to a hu-mongous year!
T___T

Wednesday, 26 January 2022

Web Tutorial: The Lucky Number Generator, redux (Part 1/2)

Wishing you, dear readers, a fortituous Year of the Tiger!

Back in 2019 during the Year of the Pig, I released this web tutorial that took you through how to create a JavaScript library that created a lucky number generator. Today, I will be expanding on it. We will add code to draw a tiger... but at the same time we will amend the code to display the appropriate animal for the year.

You can get the original code from this GitHub repository.

We will first make this code less specific to 2019. First, change the name of the file tt_cny2019.html. Maybe to tt_cny2022.html, or something. I'm just going to change the title, and the name of the JavaScript file.

tt_cny2022.html
<title>CNY Test</title>

<style>
    body
    {
        background-color: #444400;
        color: #AAAA00;
        font-family: verdana;
    }

    p
    {
        width:80%;
        text-align: justify;
    }
</style>

<script charset="UTF-8" src="cny.js">
</script>


At the body tag's onload attribute, we change the function name from cny2019() to just cny(). And then we pass in "2019" as an argument. The idea here is to render the animal based on the year passed in.

tt_cny2022.html
<body onload="cny(2019)">


Now, we are going to take a look at the JavaScript file. We want to preserve the drawing of the pig, while allowing for other animals to be drawn. Most of the functionality existing here can be preserved, with just a few modifications.

As before, we change the function name. And we make sure it has a parameter, year.

cny.js
function cny(year)
{


In the function, replace all mentions of "pig" with the more generic "animal". Also, we want to remove all mentions of "2019".

cny.js
function cny(year)
{
    var overlay = createOverlay();
    var caption = createCaption();
    var animal = createAnimal();
    var body = document.getElementsByTagName("body");

    overlay.appendChild(caption);
    overlay.appendChild(animal);
    body[0].appendChild(overlay);

    animal.onclick = function()
    {


Now, we want a mechanism to determine which animal to draw. First, we define an array, animalNames. In it, we put in all the animals of the Chinese zodiac. We'll start with the Year of the Pig, just for simplicity.

cny.js
function cny(year)
{
    var animalNames = ["pig", "rat", "ox", "tiger", "rabbit", "dragon", "snake", "horse", "goat", "monkey", "rooster", "dog"];

    var overlay = createOverlay();
    var caption = createCaption();
    var animal = createAnimal();
    var body = document.getElementsByTagName("body");    


Now, declare yearStart and set it to 2019. That's our starting year, the Year of the Pig.

cny.js
function cny(year)
{
    var animalNames = ["pig", "rat", "ox", "tiger", "rabbit", "dragon", "snake", "horse", "goat", "monkey", "rooster", "dog"];
    var yearStart = 2019;


    var overlay = createOverlay();
    var caption = createCaption();
    var animal = createAnimal();
    var body = document.getElementsByTagName("body");    


The next variable to declare is yearIndex. This will act as a pointer into animalNames. To determine its value, we first take year and subtract yearStart. Normally, that should be enough to give us an animal. If we input 2022, the current year, the value of this with 2019 subtracted would be 3. If we take the element number 3 of animalNames, that's the tiger!

cny.js
function cny(year)
{
    var animalNames = ["pig", "rat", "ox", "tiger", "rabbit", "dragon", "snake", "horse", "goat", "monkey", "rooster", "dog"];
    var yearStart = 2019;
    var yearIndex = (year - yearStart);

    var overlay = createOverlay();
    var caption = createCaption();
    var animal = createAnimal();
    var body = document.getElementsByTagName("body");    


But what if it's, say, ten years later? What if we input 2032 as year into the cny() function? Then, we follow up by dividing the result by the length of animalNames, which is 12, and taking the remainder! That's where the modulus operator comes in.

cny.js
function cny(year)
{
    var animalNames = ["pig", "rat", "ox", "tiger", "rabbit", "dragon", "snake", "horse", "goat", "monkey", "rooster", "dog"];
    var yearStart = 2019;
    var yearIndex = (year - yearStart) % animalNames.length;

    var overlay = createOverlay();
    var caption = createCaption();
    var animal = createAnimal();
    var body = document.getElementsByTagName("body");    


Then we take yearIndex, use it to reference animalNames, and pass it into the createAnimal() function as an argument.

cny.js
function cny(year)
{
    var animalNames = ["pig", "rat", "ox", "tiger", "rabbit", "dragon", "snake", "horse", "goat", "monkey", "rooster", "dog"];
    var yearStart = 2019;
    var yearIndex = (year - yearStart) % animalNames.length;

    var overlay = createOverlay();
    var caption = createCaption();
    var animal = createAnimal(animalNames[yearIndex]);
    var body = document.getElementsByTagName("body");    


There is a piece of animation code further down, which was used to animate the pig. We will enclose it within a conditional block which checks if the animal to be drawn is the pig.

cny.js
if (animalNames[yearIndex] == "pig")
{

    setInterval
    (
        function()
        {
            var eyes = document.getElementsByClassName("cny_eyes");

            eyes[0].innerHTML = "-&nbsp;&nbsp;-";

            setTimeout
            (
                function()
                {
                    eyes[0].innerHTML = "&bull;&nbsp;&nbsp;&bull;";
                },
                500
            );
        },
        5000
    );

    setInterval
    (
        function()
        {
            var tail = document.getElementsByClassName("cny_tail");

            tail[0].style.transform = "rotate(-185deg)";

            setTimeout
            (
                function()
                {
                    tail[0].style.transform = "rotate(-175deg)";
                },
                500
            );
        },
        1000
    );        
}


We will do the same in the function that is now called createAnimal().

cny.js
function createAnimal(animalName)
{
    if (animalName == "pig")
    {

        function createLeg()
        {
            var leg = document.createElement("div");
            leg.style.position = "relative";
            leg.style.width = "8px";
            leg.style.height = "15px";
            leg.style.borderRadius = "50%";
            leg.style.backgroundColor = "rgba(255, 100, 100, 1)";

            return leg;
        }

        var torso = document.createElement("div");
        torso.style.width = "80px";
        torso.style.height = "70px";
        torso.style.borderRadius = "50%";
        torso.style.position = "relative";
        torso.style.backgroundColor = "rgba(255, 100, 100, 1)";
        torso.style.float = "right";
        torso.style.cursor = "pointer";

        var tail = document.createElement("div");
        tail.className = "cny_tail";
        tail.style.width = "80px";
        tail.style.height = "10px";
        tail.style.position = "relative";
        tail.style.margin = "10px auto 0 auto";
        tail.style.fontSize = "20px";
        tail.style.fontWeight = "bold";
        tail.style.textAlign = "center";
        tail.style.color = "rgba(255, 100, 100, 1)";
        tail.innerHTML = "&zeta;";
        tail.style.webkitTransformOrigin = "50% 0";
        tail.style.transformOrigin = "50% 0";
        tail.style.webkitTransform = "rotate(-180deg)";
        tail.style.transform = "rotate(-180deg)";
        tail.style.webkitTransition = "all 0.5s";
        tail.style.transition = "all 0.5s";
    
        var eyes = document.createElement("div");
        eyes.className = "cny_eyes";
        eyes.style.width = "80px";
        eyes.style.height = "20px";
        eyes.style.position = "relative";
        eyes.style.margin = "15px auto 0 auto";
        eyes.style.fontSize = "15px";
        eyes.style.fontWeight = "bold";
        eyes.style.textAlign = "center";
        eyes.style.color = "rgba(0, 0, 0, 1)";
        eyes.innerHTML = "&bull;&nbsp;&nbsp;&bull;";

        var snout = document.createElement("div");
        snout.style.width = "20px";
        snout.style.height = "15px";
        snout.style.borderRadius = "50%";
        snout.style.position = "relative";
        snout.style.backgroundColor = "rgba(200, 50, 50, 1)";
        snout.style.margin = "0 auto 0 auto";
        snout.style.fontSize = "10px";
        snout.style.fontWeight = "bold";
        snout.style.textAlign = "center";
        snout.style.color = "rgba(100, 20, 20, 1)";
        snout.innerHTML = "&bull;&bull;";
    
        var legs = document.createElement("div");
        legs.style.width = "70px";
        legs.style.height = "16px";
        legs.style.position = "relative";
        legs.style.margin = "-17px auto 0 auto";
            
        var leg1 = createLeg();
        leg1.style.float = "left";
        leg1.style.margin = "5px 0 0 5px";
        
        var leg2 = createLeg();
        leg2.style.float = "right";
        leg2.style.margin = "5px 5px 0 0";

        var leg3 = createLeg();
        leg3.style.float = "left";
        leg3.style.margin = "-8px 0 0 0px";
        
        var leg4 = createLeg();
        leg4.style.float = "right";
        leg4.style.margin = "-8px 0px 0 0";
        
        legs.appendChild(leg3);
        legs.appendChild(leg1);
        legs.appendChild(leg4);
        legs.appendChild(leg2);    
        
        torso.appendChild(tail);
        torso.appendChild(eyes);
        torso.appendChild(snout);
        torso.appendChild(legs);
        
        return torso;            
    }
}


What we need to do next is remove that delightful pun from the couplet in the createCaption() function and replace it with something more generic.

cny.js
leftcol.innerHTML = "<br />你<br />恭<br />喜<br />发<br />财<br />!<br />";


And there, the code still works as before.


Now with all the prep done, we will go on ahead to draw that tiger.

Next

Drawing the tiger using CSS.