Showing posts with label email. Show all posts

Monday, 23 December 2024

Web Tutorial: NodeJS Christmas Mailer (Part 3/3)

Time to do some mailing! We'll need to install the nodemailer package like so.
install --save nodemailer


This package handles transport for SMTP. We'll only require nodemailer during this route.

app.js
app.post("/process", (req, res)=> {
  var nodemailer = require("nodemailer");
  
  console.log(req.body);
  res.redirect(303, "/thankyou");
});


Once we've assigned the resultant object to the variable nodemailer, we call the createTransport() method and assign the result to transport.

app.js
app.post("/process", (req, res)=> {
  var nodemailer = require("nodemailer");

  var transport = nodemailer.createTransport();

  console.log(req.body);
  res.redirect(303, "/thankyou");
});


When you run createTransport(), you'll need to pass in a JSON object with the following properties. Inside it, auth is an object as well with user and pass as properties.

app.js
app.post("/process", (req, res)=> {
  var nodemailer = require("nodemailer");

  var transport = nodemailer.createTransport({
    service: ,
    host: ,
    secure: ,
    port: ,
    auth: {
      user: ,
      pass:
    }
  }
);

  console.log(req.body);
  res.redirect(303, "/thankyou");
});


I'll be using Google's Gmail for this. If you'r also using Gmail, the service, host and port properties are as follows. You need to look up the values for any other service you'd like to use. secure will be set to true in most (if not all) cases.

app.js
app.post("/process", (req, res)=> {
  var nodemailer = require("nodemailer");

  var transport = nodemailer.createTransport({
    service: "Gmail",
    host: "smtp.gmail.com",
    secure: true,
    port: 465,
    auth: {
      user: ,
      pass:
    }
  });

  console.log(req.body);
  res.redirect(303, "/thankyou");
});


For auth, we'll use these values. Remember how we set the secret in the auth.js file? Well, we'll be doing something similar here.

app.js
app.post("/process", (req, res)=> {
  var nodemailer = require("nodemailer");

  var transport = nodemailer.createTransport({
    service: "Gmail",
    host: "smtp.gmail.com",
    secure: true,
    port: 465,
    auth: {
      user: auth.mail.user,
      pass: auth.mail.password
    }
  });

  console.log(req.body);
  res.redirect(303, "/thankyou");
});


In here, I have the mail object with user and password as properties. user is the email address I want to use, and password is the app password I obtained for this. Here's the procedure you need to follow for a Gmail account. The email service you eventually choose may have its own procedure.

auth.js
module.exports = {
  secret: "thisisasecret",
  mail: {
    user: "teochewthunder@gmail.com",
    password: "xxxx xxxx xxxx xxxx"
  }

}


Now create the options object. The properties from and to are email addresses. from will be the email address you send from, so I use my own email address. to is the email address specified n the form submitted by the user.

app.js
app.post("/process", (req, res)=> {
  var nodemailer = require("nodemailer");

  var transport = nodemailer.createTransport({
    service: "Gmail",
    host: "smtp.gmail.com",
    secure: true,
    port: 465,
    auth: {
      user: auth.mail.user,
      pass: auth.mail.password
    }
  });

  var options = {
    from: "teochwthunder@gmail.com",
    to: req.body.txtEmail,
    subject: ,
    text:
  };


  console.log(req.body);
  res.redirect(303, "/thankyou");
});


subject can be any text. I'm just going to keep it simple. And text is the content specified in the form.

app.js
var options = {
  from: "teochwthunder@gmail.com",
  to: req.body.txtEmail,
  subject: "A Christmas message from your friend has arrived!",
  text: req.body.txtMessage
};


After that, we use the sendMail() method of the transport object. The first argument is options, since this tells nodemailer the particulars of who and what to send. The second is a callback with the parameter error.

app.js
var options = {
  from: "teochwthunder@gmail.com",
  to: req.body.txtEmail,
  subject: "A Christmas message from your friend has arrived!",
  text: req.body.txtMessage
};

transport.sendMail(options, (error) => {

});  


console.log(req.body);
res.redirect(303, "/thankyou");


If error exists, we handle it the way we've handled code 500 errors. Otherwise, we redirect to the thankyou route. Which also means we will no longer be needing the code below that, so comment it off.

app.js
transport.sendMail(options, (error) => {
  if (error) {
    res.render("500", { errorMessage: error.code });
  } else {
    res.redirect(303, "/thankyou");
  }
});  

console.log(req.body);
//res.redirect(303, "/thankyou");
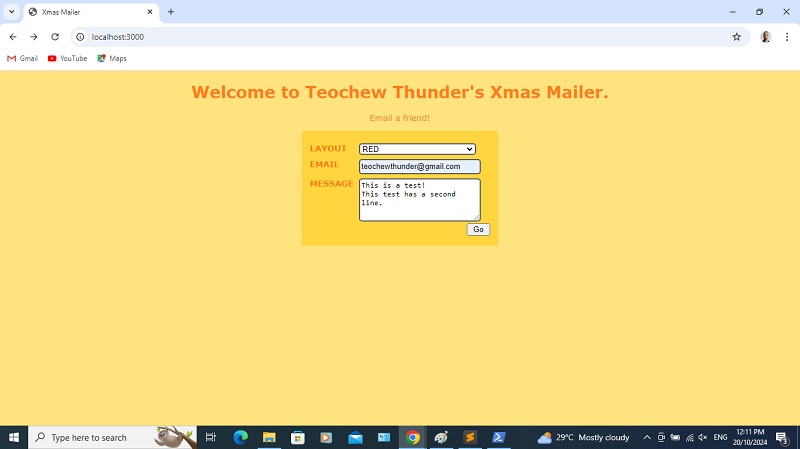

Let's try this.


This is the email!


HTML Email

Let's take this a step further. We've already nailed down the process of sending email. Now, we want to render the email in HTML. For this, we create a layout, emailtemplate.handlebars. This has a table-based layout and inline CSS - really retro stuff because that's the safest way in email browsers. Note that the style attributes have been left as blank strings.

views/emailtemplate.handlebars
<table border="0" width="500px" cellpadding="5" cellspacing="0" style="font-size:14px;text-align: center;">
  <tr>
    <td colspan = "2" style="">
      <h1 style="">MERRY CHRISTMAS!</h1>
    </td>
  </tr>

  <tr>
    <td style="" width="70%">
      <p style=""></p>
    </td>
    <td style="">
      <table cellpadding="5" cellspacing="0">
        <tr>
          <td style=""></td>
          <td style=""></td>
          <td style=""></td>
          <td style="">&#9733;</td>
          <td style=""></td>
          <td style=""></td>
          <td style=""></td>
        </tr>
        <tr>
          <td style=""></td>
          <td style=""></td>
          <td style=""></td>
          <td style="">&#9679;</td>
          <td style=""></td>
          <td style=""></td>
          <td style=""></td>
        </tr>
        <tr>
          <td style=""></td>
          <td style=""></td>
          <td style="">&#9679;</td>
          <td style="">&#9679;</td>
          <td style="">&#9679;</td>
          <td style=""></td>
          <td style=""></td>
        </tr>
        <tr>
          <td style=""></td>
          <td style="">&#9679;</td>
          <td style="">&#9679;</td>
          <td style="">&#9679;</td>
          <td style="">&#9679;</td>
          <td style="">&#9679;</td>
          <td style=""></td>
        </tr>
        <tr>
          <td style="">&#9679;</td>
          <td style="">&#9679;</td>
          <td style="">&#9679;</td>
          <td style="">&#9679;</td>
          <td style="">&#9679;</td>
          <td style="">&#9679;</td>
          <td style="">&#9679;</td>
        </tr>
        <tr>
          <td style=""></td>
          <td style=""></td>
          <td style=""></td>
          <td style="">&nbsp;</td>
          <td style=""></td>
          <td style=""></td>
          <td style=""></td>
        </tr>        
      </table>
    </td>
  </tr>
  <tr>
    <td colspan = "2" style="">
      <p style="">- Teochew Thunder</p>
    </td>
  </tr>
</table>


Now let's add placeholders for content and variables such as colors0, colors1, colors2, colors3, colors4.

views/emailtemplate.handlebars
<table border="0" width="500px" cellpadding="5" cellspacing="0" style="font-size:14px;text-align: center;">
  <tr>
    <td colspan = "2" style="background-color:{{ colors0 }};">
      <h1 style="color:{{ colors4 }};">MERRY CHRISTMAS!</h1>
    </td>
  </tr>

  <tr>
    <td style="background-color:{{ colors1 }};" width="70%">
      <p style="color:{{ colors4 }};">{{{ message }}}</p>
    </td>
    <td style="background-color:{{ colors4 }};text-align:center;">
      <table cellpadding="5" cellspacing="0">
        <tr>
          <td style=""></td>
          <td style=""></td>
          <td style=""></td>
          <td style="color:#FFFF00;">&#9733;</td>
          <td style=""></td>
          <td style=""></td>
          <td style=""></td>
        </tr>
        <tr>
          <td style=""></td>
          <td style=""></td>
          <td style=""></td>
          <td style="color:{{ colors1 }};font-size:2em;">&#9679;</td>
          <td style=""></td>
          <td style=""></td>
          <td style=""></td>
        </tr>
        <tr>
          <td style=""></td>
          <td style=""></td>
          <td style="color:{{ colors1 }};font-size:2em;">&#9679;</td>
          <td style="color:{{ colors2 }};font-size:2em;">&#9679;</td>
          <td style="color:{{ colors1 }};font-size:2em;">&#9679;</td>
          <td style=""></td>
          <td style=""></td>
        </tr>
        <tr>
          <td style=""></td>
          <td style="color:{{ colors1 }};font-size:2em;">&#9679;</td>
          <td style="color:{{ colors2 }};font-size:2em;">&#9679;</td>
          <td style="color:{{ colors3 }};font-size:2em;">&#9679;</td>
          <td style="color:{{ colors2 }};font-size:2em;">&#9679;</td>
          <td style="color:{{ colors1 }};font-size:2em;">&#9679;</td>
          <td style=""></td>
        </tr>
        <tr>
          <td style="color:{{ colors1 }};font-size:2em;">&#9679;</td>
          <td style="color:{{ colors2 }};font-size:2em;">&#9679;</td>
          <td style="color:{{ colors3 }};font-size:2em;">&#9679;</td>
          <td style="color:{{ colors2 }};font-size:2em;">&#9679;</td>
          <td style="color:{{ colors3 }};font-size:2em;">&#9679;</td>
          <td style="color:{{ colors2 }};font-size:2em;">&#9679;</td>
          <td style="color:{{ colors1 }};font-size:2em;">&#9679;</td>
        </tr>
        <tr>
          <td style=""></td>
          <td style=""></td>
          <td style=""></td>
          <td style="background-color:{{ colors0 }};">&nbsp;</td>
          <td style=""></td>
          <td style=""></td>
          <td style=""></td>
        </tr>        
      </table>
    </td>
  </tr>
  <tr>
    <td colspan = "2" style="background-color:{{ colors0 }};text-align: right;">
      <p style="color:{{ colors4 }};">- Teochew Thunder</p>
    </td>
  </tr>
</table>


Back to the process route, we define layoutColors as an object with three properties - red, green and blue. Each is an array containing hex values. Basically they are shades of red, green and blue.

app.js
var transport = nodemailer.createTransport({
  service: "Gmail",
  host: "smtp.gmail.com",
  secure: true,
  port: 465,
  auth: {
    user: auth.mail.user,
    pass: auth.mail.password
  }
});

var layoutColors = {
  red: ["#440000", "#AA0000", "#FF0000", "#FFAAAA", "#FFCCCC"],
  green: ["#004400", "#00AA00", "#00FF00", "#AAFFAA", "#CCFFCC"],
  blue: ["#000044", "#0000AA", "#0000FF", "#AAAAFF", "#CCCCFF"],
};


var options = {
  from: "teochwthunder@gmail.com",
  to: req.body.txtEmail,
  subject: "A Christmas message from your friend has arrived!",
  text: req.body.txtMessage
};


We then use render() to create the HTML using the template we defined earlier, with an object that we will fill in soon. After rendering, we have a callback, where html is the HTML rendered. In it, we first check if error exists, and handle it if so. Otherwise, we go to the code we wrote earlier.

app.js
var layoutColors = {
  red: ["#440000", "#AA0000", "#FF0000", "#FFAAAA", "#FFCCCC"],
  green: ["#004400", "#00AA00", "#00FF00", "#AAFFAA", "#CCFFCC"],
  blue: ["#000044", "#0000AA", "#0000FF", "#AAAAFF", "#CCCCFF"],
};

res.render("emailtemplate", {}, (error, html) => {
  if (error) {
    console.log(error);
    res.render("500", { errorMessage: error.code });
  } else {

    var options = {
      from: "teochwthunder@gmail.com",
      to: req.body.txtEmail,
      subject: "A Christmas message from your friend has arrived!",
      text: req.body.txtMessage
    };
  
    transport.sendMail(options, (error) => {
      if (error) {
        console.log(error);
        res.render("500", { errorMessage: error.code });
      } else {
        res.redirect(303, "/thankyou");
      }
    });
  }  
});


Then we fill in the object that will populate values in the template. Layout is null, because there is no layout - we're using emailtemplates.handlebars by itself. We determine colors0, colors1, colors2, colors3 and colors4 based on the value of the drop-down list submitted in the form. And message is the value of txtMessage, with the line breaks replaced with HTML breaks.

app.js
var layoutColors = {
  red: ["#440000", "#AA0000", "#FF0000", "#FFAAAA", "#FFCCCC"],
  green: ["#004400", "#00AA00", "#00FF00", "#AAFFAA", "#CCFFCC"],
  blue: ["#000044", "#0000AA", "#0000FF", "#AAAAFF", "#CCCCFF"],
};

res.render("emailtemplate", {
  layout: null,
  colors0: layoutColors[req.body.ddlLayout][0],
  colors1: layoutColors[req.body.ddlLayout][1],
  colors2: layoutColors[req.body.ddlLayout][2],
  colors3: layoutColors[req.body.ddlLayout][3],
  colors4: layoutColors[req.body.ddlLayout][4],
  message: req.body.txtMessage.split("\n").join("<br />")

}, (error, html) => {
  if (error) {
    console.log(error);
    res.render("500", { errorMessage: error.code });
  } else {
    var options = {
      from: "teochwthunder@gmail.com",
      to: req.body.txtEmail,
      subject: "A Christmas message from your friend has arrived!",
      text: req.body.txtMessage
    };
  
    transport.sendMail(options, (error) => {
      if (error) {
        console.log(error);
        res.render("500", { errorMessage: error.code });
      } else {
        res.redirect(303, "/thankyou");
      }
    });
  }
});


Except that the mailing code now has HTML instead of text. And we use the html value instead of the text value of txtMessage.

app.js
var options = {
  from: "teochwthunder@gmail.com",
  to: req.body.txtEmail,
  subject: "A Christmas message from your friend has arrived!",
  html: html
};


Now let's send the form again.


Try the green layout.


And the blue.


Merry Christmas!

This wasn't my fanciest work, I'm afraid. Just wanted to feel my way around NodeJS. But we all have to start somewhere!

Try Nodemailer today. Yule love it!
T___T

Friday, 20 December 2024

Web Tutorial: NodeJS Christmas Mailer (Part 2/3)

All-righty then!

We have a form and now we're going to handle it. Remember the form will use the process route? Well, let's create that. Note that this is a POST.

app.js
app.get("/thankyou", (req, res)=> {
  res.render("thankyou");
});

app.post("/process", (req, res)=> {

}


app.use((req, res, next)=> {
  res.status(404);
  res.render("404");
});


But if we want to grab the values of the form, we have to install another module. I use this one, but it might be deprecated at this point, so if you can find something better, go with that.
install --save body-parser


We'll need to include this. We will use the middleware function use() and pass in the module body-parser.

app.js
app.set("view engine", "handlebars");
app.set("port", process.env.PORT || 3000);

app.use(require("body-parser")());

app.get("/", (req, res)=> {
  res.render("form");
});


Back to the process route. Log the body object from req.

app.js
app.post("/process", (req, res)=> {
  console.log(req.body);
});


Then redirect to the thankyou route with a Status of 303. We use 303 to prevent the repeated submission of form data if page is refreshed.

app.js
app.post("/process", (req, res)=> {
  console.log(req.body);
  res.redirect(303, "/thankyou");
});


Now to test this. Fill up the form.


You should see this in the CLI! This will be information you can use.

Also, see what happens when you try to submit the form without filling stuff in. HTML5 does its thing. Let's use this as an excuse not to spend time validating the fields on the server. Just for today.


Implementing anti-CSRF

This is not mandatory to ensure that your form works, but it's pretty damn important, anyway. An anti-CSRF token is a mechanism to ensure that the request comes from a legitimate source. Probably overkill for this form, but let's see how it's done.

We'll use the csurf module.
install --save csurf


But an anti-CSRF token also needs cookies and sessions. So we'll need to install these too.
install --save express-session
install --save cookie-parser


Add in these modules.

app.js
app.use(require("body-parser")());
app.use(require("cookie-parser")());
app.use(require("express-session")());
app.use(require("csurf")());


app.get("/", (req, res)=> {
  res.render("form");
});


When you try to run the app again, you'll get this error. That's because the cookie-parser module requires a secret.


Actually, even a string containing only a single space, qualifies as a secret. This will suffice to get things working again. But that's not a good way to do things.

app.js
app.use(require("cookie-parser")(" "));


What we should do, is create a file separate from app.js. Let's call it auth.js. In it, we will declare that this file exports an object. This object has a property, secret. Here, just use any string you like as its value.

auth.js
module.exports = {
  secret: "thisisasecret"
}


Then import auth.js using the require() function, and set the result to the variable auth.

app.js
var auth = require("./auth.js");
var express = require("express");

var app = express();


And here, instead of the string we used earlier, we have the secret property of auth.
app.js
app.use(require("cookie-parser")(auth.secret));


Now things should run! However, when you attempt to submit the form, you should get this error. That's because once you include the module csurf, you're expected to have the anti-CSRF token as part of the form, and we haven't done that yet.


Before we do that, however, let's tidy up one loose end. Remember the last two errors you've seen was ugly black text and white backgrounds? Let's change that. Add another middleware function after the one we used to handle 404s. This one has the err parameter in the callback. So if the URL is valid but an error is thrown, the status is set to 500 and we render the page 500.

app.js
app.use((req, res, next)=> {
  res.status(404);
  res.render("404");
});

app.use((err, req, res, next)=> {
  res.status(500);
  res.render("500");
});


app.listen(app.get("port"), ()=> {

});


But we also want to pass in information, so let's use the code property of err, and set it as the value of errorMessage which we will pass into the page.

app.js
app.use(function(err, req, res, next) {
  res.status(500);
  res.render("500", { errorMessage: err.code });
});


In here, you'll see where we've placed errorMessage.

views/500.handlebars
<h1>500</h1>

<p>There was an error.</p>
<p><b>{{ errorMessage }}</b></p>


Now run the code again! There's still an error, but we've beautified it.


OK, let's now create the anti-CSRF token. Add this object in the call to render(), as a second argument. It will have the property _csrf and the value is the value returned by calling the csrfToken() method of the req object.

app.js
app.get("/", (req, res)=> {
  res.render("form", { csrf: req.csrfToken() });
});


Now in the view form, add a text field for that value. The name of the field is _csrf.

views/form.handlebars
<form action="/process" method="POST">
  <input type="text" name="_csrf" value="{{ csrf }}" />
  <label for="ddlLayout">
    <span class="labelText">LAYOUT</span>
    <select id="ddlLayout" name="ddlLayout">
      <option value="red">RED</option>
      <option value="green">GREEN</option>
      <option value="blue">BLUE</option>
    </select>
  </label>


We should see the value in there!


Change the type attribute to hidden, because while we want the element in the form, we don't want it to be seen.

views/form.handlebars
<input type="hidden" name="_csrf" value="{{ csrf }}" />


Try submitting the form again and this time it should work.

And we're done here. What we want to do next, is use the values submitted via the form, to send a HTML email!

Next

Mailing and HTML emails.

Tuesday, 17 December 2024

Web Tutorial: NodeJS Christmas Mailer (Part 1/3)

Tis the season to be jolly, readers! In the spirit of learning, we'll be exploring a bit of NodeJS today. I'm a bit of a beginner here myself, so bear with me!

What we'll do here, is create a web form that will send a HTML email. Sounds simple, and it is! However, that comes with a few considerations. So buckle up; this sleigh is going on a ride.

You should already have a Node environment, and set up the folder in which you'll be working. To begin, we install Express because it will take care of the tedious and repetitive scaffolding.
install --save express


Now create this file. This will be the file which we run whenever we need to restart the script. We need to run the require() function with "express" as an argument, then assign the returned value (which is another function) to the variable express.

app.js
var express = require("express");


Then we run the newly-created function express() and assign the value to app.

app.js
var express = require("express");

var app = express();


Next, we'll install Handlebars as a templating engine. It's not absolutely necessary, of course, but knowing how to use a templating engine is a good basic skill. Run this in the command line.
install --save express-handlebars


Again, we need to require() handlebars. Assign the returned value to the variable handlebars.

app.js
var express = require("express");

var app = express();

var handlebars = require("express-handlebars");


Then chain this to use the method create(). In it, we pass an object with one single property - defaultLayout with a value of "main".

app.js
var express = require("express");

var app = express();

var handlebars = require("express-handlebars").create({defaultLayout:"main"});


Then, by using app's engine() method, we set the app to use the Handlebars engine (represented by the engine property of the handlebars object) and map the ".handlebars" extension to that engine.

app.js
var express = require("express");

var app = express();

var handlebars = require("express-handlebars").create({defaultLayout:"main"});
app.engine("handlebars", handlebars.engine);


Now let's set some stuff. Use the set() method of the app object, to set the view engine to handlebars.

app.js
var express = require("express");

var app = express();

var handlebars = require("express-handlebars").create({defaultLayout:"main"});
app.engine("handlebars", handlebars.engine);

app.set("view engine", "handlebars");


We also want to set the port. In this case, we use the core process object's PORT property (within the sub-object env) or 3000 if it doesn't exist (as can be the case in a different environment).

app.js
var express = require("express");

var app = express();

var handlebars = require("express-handlebars").create({defaultLayout:"main"});
app.engine("handlebars", handlebars.engine);

app.set("view engine", "handlebars");
app.set("port", process.env.PORT || 3000);


After that, we'll want to do routes. Here's our first route, and it's the most basic one. It's a GET request and it's the home address. Just a slash, with nothing after it. The second argument in the get() method is a callback. The callback uses the parameters req and res to represent the request and response.

app.js
app.set("view engine", "handlebars");
app.set("port", process.env.PORT || 3000);

app.get("/", (req, res)=> {

});


In the callback, we use the response's render() method, and pass in "form" as the argument. This means that for the home page, we want to render the form page.

app.js
app.get("/", (req, res)=> {
  res.render("form");
});


Finally, we set the app to listen at the port we set earlier. We don't have to add any more statements to the callback, but it's useful for if we need to do any troubleshooting.

app.js
app.get("/", (req, res)=> {
  res.render("form");
});

app.listen(app.get("port"), ()=> {
  
});


Remember that the default layout is main and the home page is form? Our next steps will bear this in mind. In Handlebars, these files are in the views directory by default. And layouts are stored in the layouts directory of the views directory. Let's just start with form. Create form.handlebars in views. We'll start simple, with a h1 tag and a paragraph.

views/form.handlebars
<h1>Welcome to Teochew Thunder's Xmas Mailer.</h1>
<p>Email a friend!</p>


Now let's do the layout. Create the layouts directory within views, and then create main.handlebars in that sub-directory. It's a bare-bones HTML boilerplate.

views/layouts/main.handlebars
<!DOCTYPE html>
<html>
  <head>
    <meta charset="utf-8">
    <meta name="viewport" content="width=device-width, initial-scale=1">
    <title>Xmas Mailer</title>
  </head>
  <body>

  </body>
</html>


We will add the template string that brings body into the body tag. body is a keyword in the templating engine that represents the HTML content. And in this case, the HTML content will be inside main.handlebars.

views/layouts/main.handlebars
<!DOCTYPE html>
<html>
  <head>
    <meta charset="utf-8">
    <meta name="viewport" content="width=device-width, initial-scale=1">
    <title>Xmas Mailer</title>
  </head>
  <body>
    {{{ body }}}
  </body>
</html>


You'll see this in your browser at port 3000!


Time to add some styling. Generally there's a better way to do this, but I'm just going to put all the styling in the main layout.

views/layouts/main.handlebars
<!DOCTYPE html>
<html>
  <head>
    <meta charset="utf-8">
    <meta name="viewport" content="width=device-width, initial-scale=1">
    <title>Xmas Mailer</title>

    <style>
      body {
        font-family: verdana, sans-serif;
        font-size: 14px;
        background-color: rgba(255, 200, 0, 0.5);
        color: rgba(255, 100, 0, 0.8);
      }

      h1, p {
        text-align: center;
      }
    </style>

  </head>
  <body>
    {{{ body }}}
  </body>
</html>


Here we are, styling applied.


We'll need a few more! Add the "thank you" route. It's a GET, and renders the thankyou page.

app.js
app.get("/", (req, res)=> {
  res.render("form");
});

app.get("/thankyou", (req, res)=> {
  res.render("thankyou");
});


app.listen(app.get("port"), ()=> {

});


Create this file in the views directory. It has a h1 tag, two paragraphs and a link.

views/thankyou.handlebars
<h1>Thank you!</h1>
<p>Your mail has been sent.</p>
<p><a href="./">Send another.</a></p>


Now try this URL! If you click on the link, you should go back to the main page.


We'll create routes to handle errors as well. After the two routes we've defined so far, add a middleware function. It's the use() method of the app object. Again, it has req and res, and also next. But we'll only need res.

app.js
app.get("/thankyou", (req, res)=> {
  res.render("thankyou");
});

app.use((req, res, next)=> {

});


app.listen(app.get("port"), ()=> {

});


We set the status to 404 here. Bear in mind that this code only executes if none of the other routes are triggered.

app.js
app.get("/thankyou", (req, res)=> {
  res.render("thankyou");
});

app.use((req, res, next)=> {
  res.status(404);
});

app.listen(app.get("port"), ()=> {

});


Then after that, we use the render() method to display the 404 page.

app.js
app.get("/thankyou", (req, res)=> {
  res.render("thankyou");
});

app.use((req, res, next)=> {
  res.status(404);
  res.render("404");
});

app.listen(app.get("port"), ()=> {

});


We will, of course, want to create that page under the views directory.

view/404.handlebars
<h1>404</h1>

<p>Not found!</p>


Now try this. Enter any string after the base URL, other than "thankyou". You should get this.


Now for the rest of the form!

We've learned quite a few concepts. But it's time to create the form so that we can use it in the next part of this tutorial. In this file, add the HTML form. It will submit to the process route (which we'll create in the next part of this web tutorial) and the method will be POST.

views/form.handlebars
<h1>Welcome to Teochew Thunder's Xmas Mailer.</h1>
<p>Email a friend!</p>

<form action="/process" method="POST">

</form>


We have here a label tag. Within it is a span tag styled using the CSS class labelText. The label text is "LAYOUT".
views/form.handlebars
<form action="/process" method="POST">
  <label>
    <span class="labelText">LAYOUT</span>
  </label>

</form>


We've got a few more labels. There are break tags in between.

views/form.handlebars
<form action="/process" method="POST">
  <label>
    <span class="labelText">LAYOUT</span>
  </label>

  <br />

  <label>
    <span class="labelText">EMAIL</span>
  </label>

  <br />

  <label>
    <span class="labelText">MESSAGE</span>
  </label>

</form>


In here, we allow the user to select between a red, green or blue layout by means of a drop-down list, id and name ddlLayout. We'll want to set the for attribute in the label for this, too.
views/form.handlebars
<label for="ddlLayout">
  <span class="labelText">LAYOUT</span>
  <select id="ddlLayout" name="ddlLayout">
    <option value="red">RED</option>
    <option value="green">GREEN</option>
    <option value="blue">BLUE</option>
  </select>

</label>


For email, I'm going to use a text input with type attribute set to "email". This will be a required field. The drop-down list we made earlier is also mandatory, but there's a default value in it, so no need to do anything more.

views/form.handlebars
<label for="txtEmail">
  <span class="labelText">EMAIL</span>
  <input id="txtEmail" name="txtEmail" type="email" placeholder="john12345@gmail.com" required />
</label>


For the message, I use a textarea tag. It is also mandatory.

views/form.handlebars
<label for="txtMessage">
  <span class="labelText">MESSAGE</span>
  <textarea id="txtMessage" name="txtMessage" required></textarea>
</label>


Let's go ahead and add a Submit button.

views/form.handlebars
<form action="/process" method="POST">
  <label for="ddlLayout">
    <span class="labelText">LAYOUT</span>
    <select id="ddlLayout" name="ddlLayout">
      <option value="red">RED</option>
      <option value="green">GREEN</option>
      <option value="blue">BLUE</option>
    </select>
  </label>

  <br />

  <label for="txtEmail">
    <span class="labelText">EMAIL</span>
    <input id="txtEmail" name="txtEmail" type="email" placeholder="john12345@gmail.com" required />
  </label>

  <br />

  <label for="txtMessage">
    <span class="labelText">MESSAGE</span>
    <textarea id="txtMessage" name="txtMessage" required></textarea>
  </label>

  <br />

  <button>Go</button>
</form>


Looks... meh. This is going to need more styling.


In this file, add the styling in the style tag. We want all forms (or actually, the one and only form) to have a height, width, and be in the middle of the page, and have a background color.

views/layouts/main.handlebars
<style>
  body {
    font-family: verdana, sans-serif;
    font-size: 14px;
    background-color: rgba(255, 200, 0, 0.5);
    color: rgba(255, 100, 0, 0.8);
  }

  h1, p {
    text-align: center;
  }

  form {
    width: 22em;
    height: 12em;
    padding: 1em;
    display: block;
    margin: 0 auto 0 auto;
    background-color: rgba(255, 200, 0, 0.5);
  }

</style>


The label tags are set to display as block-level elements, with a bit of a margin at the top, and font is boldened. The span tags that are styled using labelText. They're also rendered as block-level elements so that we can float them left, give them a margin to the right, and a width.

views/layouts/main.handlebars
<style>
  body {
    font-family: verdana, sans-serif;
    font-size: 14px;
    background-color: rgba(255, 200, 0, 0.5);
    color: rgba(255, 100, 0, 0.8);
  }

  h1, p {
    text-align: center;
  }

  form {
    width: 22em;
    height: 12em;
    padding: 1em;
    display: block;
    margin: 0 auto 0 auto;
    background-color: rgba(255, 200, 0, 0.5);
  }

  label {
    display: inline-block;
    margin-top: 0.5em;
    font-weight: bold;
  }

  .labelText {
    display: inline-block;
    width: 5em;
    margin-right: 1em;
    float: left;
  }

</style>


Now, we'll make sure all the textboxes and drop-down lists have fixed widths and heights, round corners and a border.

views/layouts/main.handlebars
<style>
  body {
    font-family: verdana, sans-serif;
    font-size: 14px;
    background-color: rgba(255, 200, 0, 0.5);
    color: rgba(255, 100, 0, 0.8);
  }

  h1, p {
    text-align: center;
  }

  form {
    width: 22em;
    height: 12em;
    padding: 1em;
    display: block;
    margin: 0 auto 0 auto;
    background-color: rgba(255, 200, 0, 0.5);
  }

  label {
    display: inline-block;
    margin-top: 0.5em;
    font-weight: bold;
  }

  .labelText {
    display: inline-block;
    width: 5em;
    margin-right: 1em;
    float: left;
  }

  input, select, textarea {
    border-radius: 5px;
    width: 15em;
    height: 1.5em;
    border: 2px solid rgb(100, 100, 100);
  }

</style>


But textarea tags will have a bigger height.

views/layouts/main.handlebars
<style>
  body {
    font-family: verdana, sans-serif;
    font-size: 14px;
    background-color: rgba(255, 200, 0, 0.5);
    color: rgba(255, 100, 0, 0.8);
  }

  h1, p {
    text-align: center;
  }

  form {
    width: 22em;
    height: 12em;
    padding: 1em;
    display: block;
    margin: 0 auto 0 auto;
    background-color: rgba(255, 200, 0, 0.5);
  }

  label {
    display: inline-block;
    margin-top: 0.5em;
    font-weight: bold;
  }

  .labelText {
    display: inline-block;
    width: 5em;
    margin-right: 1em;
    float: left;
  }

  input, select, textarea {
    border-radius: 5px;
    width: 15em;
    height: 1.5em;
    border: 2px solid rgb(100, 100, 100);
  }

  textarea {
    height: 5em;
  }

</style>


And lastly, we style the button.

views/layouts/main.handlebars
<style>
  body {
    font-family: verdana, sans-serif;
    font-size: 14px;
    background-color: rgba(255, 200, 0, 0.5);
    color: rgba(255, 100, 0, 0.8);
  }

  h1, p {
    text-align: center;
  }

  form {
    width: 22em;
    height: 12em;
    padding: 1em;
    display: block;
    margin: 0 auto 0 auto;
    background-color: rgba(255, 200, 0, 0.5);
  }

  label {
    display: inline-block;
    margin-top: 0.5em;
    font-weight: bold;
  }

  .labelText {
    display: inline-block;
    width: 5em;
    margin-right: 1em;
    float: left;
  }

  input, select, textarea {
    border-radius: 5px;
    width: 15em;
    height: 1.5em;
    border: 2px solid rgb(100, 100, 100);
  }

  textarea {
    height: 5em;
  }

  button {
    display: inline-block;
    width: 3em;
    float: right;
  }

</style>


And now it looks acceptable.


Next

Form handling and security

Monday, 2 December 2024

How much of the Artificial Intelligence hype is just hot air?

During an event held by Oracle in Singapore last month, I heard a speaker describe A.I as "aspirin looking for a headache". On the other hand, Linus Torvalds was rather less poetic as he described A.I, with characteristic bluntness, as "90% marketing and 10% reality".

The term "Artificial Intelligence" has infiltrated the public consciousness over the course of the past year. Tech products such as dating apps and search engines now boast A.I-powered features. Even Meta's WhatsApp now has Meta AI built in, for no discernible purpose whatsoever. The consensus seems to be that adding the term "A.I" to any product automatically raises its value in the eyes of consumers.

And sadly, they're right. Non-technical consumers tend to be a simple-minded bunch. On one hand, I feel like I should be outraged at this brazen exploitation of their gullibility. On the other hand, money needs to move in this economy, and if someone absolutely has to be parted from their money, it might as well be fools.

Shut up and take my money!

Is A.I even all that revolutionary at the moment? Back in March, Sam Altman declared that OpenAI had produced ChatGPT 4 which had enhanced reasoning abilities. This report tells us that ChatGPT 4 beats 90% of humans. If we take this to be true, does it then follow that all the "A.I-powered" features in other products up to now, have been bullshit?

As it turns out, very few people produce technology purely for the love of technology. It's a business like any other. And part of business, is hype. I can't go a day without seeing some ad for certification for A.I pop up on my screen. My feed is full of news as to how AI is going to disrupt the workforce. It's starting to feel like people want this to happen a lot more than A.I is actually capable of it. Because the perception of potentially huge profits, draws investors. Investors keep the money coming in. Few people have the patience to invest significantly in something that might be huge in a decade. However, if you can show progress now or soon, that's when the cash register sounds start ringing.

A.I up to now

Currently, at the very basic levels, A.I is being used in cheap entertainment. My Facebook feed is filled with the products of people amusing themselves with wacky A.I image or video generations. Walls of text are similarly generated through idle conversations with bots.

At work, generative A.I is used to rewrite paragraphs or even generate entirely new ones, in emails or in reports. Or create graphics for presentations. Even video. In short, nothing that wasn't possible before A.I.

The problem is, the content generated can't be implicitly trusted. And even assuming that it can, such content generation isn't anything remotely groundbreaking. Creating presentations? Rewriting paragraphs and emails and cover letters? Bluntly put, it's kids' stuff. Unless your command of the English language was terrible to begin with, this use of generative A.I won't increase quality of output. At best, the speed of which said output is produced, will increase tenfold. Quickly produced crap, however, is still crap.

When I first encountered ChatGPT, I regarded it as a fun new toy which could do amusing things like write poems, generate data about a known subject and make stuff up. And yes, even provide code for well-known algorithms. I certainly wasn't seeing ChatGPT as an equal, much less a threat to my professional existence.

The code generation capabilities were potentially interesting... but ultimately, nothing I couldn't accomplish with a Google search. And, of course, some judicious copy-pasting.

A.I in the military?

If one were into conspiracy theories, we could even entertain the idea that A.I is actually more advanced and being used by the military and secret organizations. The insipid content-generating version is the one that mere mortals like us are allowed to use, in order to distract us and lull us into a false sense of security. So while we're too busy using A.I to genderswap our favorite movie stars and making crappy deepfake porn, some people are doing exactly what they want.

Depressing thought, eh? Anyway...


A.I in the future

One question I keep getting asked is, will A.I replace humans? Are our jobs in danger? Are programmer jobs in danger? I don't know, man. You've seen the state of Generative A.I as it is now.

Text? We're talking about something that will cheerfully churn out chunks of text that looks reasonable but will probably not stand up to scrutiny. Just because something writes a lot of stuff in good English, doesn't mean the stuff is actually useful.

Images? You mean the art generators that keep rendering human hands with entirely too many fingers? The amount of effort it takes just to generate one useful image (which can never be replicated) is off-putting unless you're just doing it for recreational purposes. As for video, forget about Sora and its ilk replacing actors and film directors. The observations I made about art generators above, applies here, too.

If you can be replaced at your job by technology that produces such unusable rubbish, perhaps A.I isn't the problem. Perhaps the problem is that your job is so repetitive and needs so little human ingenuity that a machine could do it, and do it a million times faster.

The other possible problem, in the case of artists and writers, is that consumers are Phillistines and don't require content to be all that good. They're happy with sucky A.I generated monstrosities, as was the case recently when a local artist's work was plagiarised with A.I

This is not to say that A.I will not eventually replace us. "Eventually" being the operative word. For this to happen, A.I would have to hit some kind of critical point. Self-programming? Learning new logic instead of simply adding data to its memory? Actual creativity instead of merely approximating existing data from human beings?

And the golden question: When will this happen?

I don't know the answer to that question. No one does. There are too many possibilities. It could happen a hundred years from now. Or fifty. It could happen next week, or even after breakfast tomorrow. The only thing that's clear is, in its current form, A.I is not even remotely close to being an average human replacement. However, once it arrives at that critical point, not only will A.I have that human spark, it will have the speed gifted to it by technology. As to what would happen next, use your imagination.

In King Arthur's
Court.

This reminds me of a novel I once read, by Mark Twain, A Connecticut Yankee in King Arthur's Court. In the story, Hank Morgan time travels and finds himself in Camelot, making the acquiantance of the likes of Arthur, Merlin and Lancelot. The medieval English are initially hostile, but Morgan has a gun on him, and uses it to devastating effect. To the people of these times, this looks like powerful magic even though to us it's just, you know, a gun. They end up worshipping him as some kind of great wizard while Merlin looks jealously on.

Because, as we know, technology that is sufficiently advanced, is indistinguishable from magic.

Just for readers who are terrible with analogies, here are several parallels I can draw from that story to this situation. Generative A.I looks like the gun. The promoters of A.I technology such as Jensen Huang and Sam Altman, are Hank Morgan. And the rubes gushing about how transformative this new technology is, are, tragically, those primitive and technologically backward Englishmen.

Conclusion

Artificial Intelligence may or may not be increasing in actual technological depth, but its mentions are becoming increasingly ubiquitous, if not its actual usage. Time will tell if all this is smoke and mirrors.

Right now, with all the hype, A.I doesn't actually need to be that good in order to gain traction. Perception is a huge part of this. As long as there are rubes around willing to uncritically swallow what the snake oil peddlers are selling, there'll be enough goodwill to carry it. But even that goodwill is going to run out at some point. By that time, let's see if A.I has made any actual progress.

Maybe all these people who are hyping this up, who don't appear to have ever written a single line of code in their lives, are seeing something I'm not. I remain open to the possibility that I'm wrong about this. I want to be wrong about this. It would be beyond exciting if so.

Artificial regards,
T___T

Thursday, 7 December 2023

Whose Fault Is It, Really?

Assigning blame is often the simplest task in the modern professional workplace. Pointing fingers comes almost second nature when something goes wrong.

Sometimes, it's meant to be an exercise in pinpointing target areas that need to be addressed. And that's a good thing; problems can't be solved if they aren't first identified and acknowledged.

Other times, it's pure animal instinct. We tell ourselves that we just want to solve the problem, but the problem could actually be ourselves. And pointing those fingers elsewhere is more self-preservation. It's a cop-out, the refuge of the weak.

The finger-pointing game.

The tragedy is that Management isn't immune to this; quite often, they're the ones most guilty of this. Sure, I could fill pages talking about the bosses I've encountered who simply refused to accept responsibility for things going south. And arguably, their sin is greater. After all, the higher up the ladder you are, the greater the responsibility.

However, in the spirit of this blogpost, I'm going to direct this at myself.

The last few years have been the first time in my long and storied career that I was ever in a position of leadership, in the sense that people looked to me for guidance. And I'm not proud to say there were some times I fell short, especially when it came to accepting responsibility. In these cases, my first instinct was to be annoyed with my co-workers for screwing up.

Case #1: The Painfully Simple Mistake

One of these cases happened when a co-worker sent me a CSV data file to upload into a system I had written. Now, mistakes in data are common, and what can I say, they happen. This co-worker sometimes sent me files with hundreds, sometimes a couple thousand rows, and if there were mistakes in the data, I shrugged it off, quietly cleaned it up and got on with it.

The problem was, the latest CSV file had only five rows in it. And all of them had the same mistake. Now if a thousand row CSV file has mistakes, I'm inclined to be forgiving. But if you can't get five lines of data right, this is not something that can be explained away by incompetence, because my opinion is that nobody is that incompetent. Rather, this tells me that the guilty party has lost interest in staying employed.

Only five!

Thus, I had to be very firm in my communication. We were two years into using this system, and mistakes like these just were not acceptable, especially not when the mistake in question happened in a five row CSV file. I felt like an asshole after that, because there is no way to point all of that out without insulting the other party's competence, no matter how politely and charitably the email is worded. I simply don't have the soft skills for that level of diplomacy.

But then arose the question: whose fault is it, really?

I could have said something when mistakes were occurring in bigger files. That way, I could have been understanding but firm. Instead, I chose to clean up quietly and the result was that they got comfortable thinking they could just hand me rubbish and I would just make it work. In effect, I let the situation escalate till there was no way for me to be nice about it. Whose fault was it that I'd been painted into that corner? Mine. I have to accept some degree of culpability.

Case #2: The Lack of Understanding

There was a certain tech process that needed to be done yearly. One of my colleagues, further down the hierarchy, was tasked with carrying out the process. Towards the deadline, there was a bunch of emails as he posed certain questions regarding the process, to different departments. This would normally be my area of expertise, but being swamped with more urgent matters, I elected to spend my time on those matters and let others answer those queries.

A week from the deadline, I found that there was a mistake in the process. My colleague suggested remedies, but his suggestions proved to me that while he had memorized the process, he did not actually understand the process and what had gone wrong. Consequently, his suggestions would never have worked. I made my exasperation known.

Again, whose fault is it, really?

Did he do anything wrong? Technically, yes, due to an unexpected variation in the conditions, he proceeded to carry out the process incorrectly. He had failed to understand the process. But see, understanding the process wasn't his job. It was mine. At my level, as the undisputed programming expert in that very non-technical company, I was supposed to be providing the proper guidance. Understanding the process was above his pay grade. At his pay grade, all he could actually be expected to do was show up to work on time, do his job, and leave on time.

I should know. I've been where he is. The fact that I'm no longer at that position was because when I was in that position, I did more than was expected of me. However, that should be an individual choice. He did his job. It was me who was guilty of negligence. And being in the position I am now, I need to own it.

The crown's heavier
than it looks.

They say "heavy is the head that wears the crown". Well, what I was wearing wasn't exactly a crown, but it had been my responsibility, as head of that department, to either ensure that those executing the process understood the process, or step in before something went wrong. I had done neither. This was my screw-up.

And if I were to honestly examine my own exasperation, I was actually more annoyed with myself than with him. And rightfully so.

The Takeaway

I've often pissed on people in positions of authority who seem incapable of acknowledging their own culpability in any sort of mess that occurs. This has shown me, upon introspection, that I'm not automatically immune to this foible. It takes both conscious effort and humility.

Titles aren't just words. The onus is on the holder of said title, to provide that title, via action, some legitimacy.

Own your shit, yo.
T___T

Thursday, 30 June 2022

Is the written component overrated in professional communication?

Communication is one of the most important parts of the software developer profession. Or indeed, just about any profession. Instructions get passed along, feedback is received and along the chain of events that happen, information mutates. This information may affect what other operations take place, and this in turn has an ever-widening effect on things further down the chain.

So yes, communication is vital. But just speaking of communication alone would be a scope too large for a single blogpot or article. Thus, for today, I would like to speak on something I discovered about verbal and written communication, as a software developer.

Written or verbal?

Written communication is generally preferred because there is a "paper" trail that can be referred to if clarification is required. Verbal communication is considered transient and informal. No corporation, for instance, would consider a verbal exchange a legally-binding contract. No team lead would ever rely solely on verbal communication to convey instructions. The main mode of communication is almost invariably task specifications written in a Kanban card, or even an email.

With written communication, one of the advantages is that people generally are able to carefully consider their words before hitting the Send button (not that everybody does, regrettably). Therefore, the consensus seems to be that written communication is generally clearer.

However...

Is written communication truly clearer than verbal? There are some instances where this is not the case.

Recently there was an incident in the company where I worked. My colleague encountered a problem with the system I was managing. To her credit, she went by the book - sent me screenshots, even a video, and what she thought was a clear explanation of what she had expected as output, and what was wrong with the output she had received.

The problem was with the last part - I understood not a single thing she was saying in her email. Even discounting typos and grammatical errors, I could not get a sense of what she was trying to tell me. After a couple of frustrating exchanges through email, we communicated via a video call. Within minutes of her speaking, the lightbulb went off in my head. Now when I looked back at her emails and her written descriptions, I knew exactly what she was saying.

Hearing words
makes a difference.

Was what she had written in the emails, different from what she had verbally said? Now that I had a chance to do a side-by-side comparison, not so much. The difference was mainly in inflection and tone - both of which were missing in her written emails, and probably in most written media. However, in our local lingo, both inflection and tone convey a multitude of different meanings, and as such they play a huge part in the communication process. Listening to her speak was simply not the same as reading her writing. Probably because she tended to write the way she spoke - another cardinal sin of communication, but one we won't get into today.

In another example...

I had a similar experience on the Clubhouse app. I was in a room where this woman from Trinidad And Tobago in the continent of Africa, was reading from a novel set in that area. I had previously read a bit of the novel, but given up halfway because the dialogue, on the written page, was incomprehensible to me.

However, as I heard her say the words of the dialogue, which was in the Trini slang, using her Trini accent, suddenly it all made perfect sense.

I don't know exactly why that would be the case. I do know that if I were to read the dialogue again, it would be from a position where, having already heard it, I would now know what it meant.

The Communicative Conclusion

Verbal communication can be more powerful than people realize. With audio, one can convey some other dimension in the communication, pieces which may be missing in a written medium. One might argue that being more proficient at written English might solve the problem. It will mitigate the problem, certainly, but it will never replace what verbal communication brings to the table.

Let's have this in writing!
T___T